Thursday, December 31, 2009
Gingerbread Popcorn: Streetname...G-Crack
I'm loathe to even reprint this heinous recipe. Especially since it's after Christmas and there's absolutely no call, NO CALL I tell you, for making this. Just don't go there. Don't do it.
Weeeeelllll, you could just try a 1/3 of the recipe. Maybe 1/2 since it's easier to figure that way. ;-)
G-Crack:
(gleaned from Culinary in the Desert's blog)
15 cups of popped popcorn (I used 3 bags of Central Market's All Natural microwave popcorn)
2 cups of packed brown sugar
1 cup butter (2 sticks)
1/4 cup molasses
1/4 cup corn syrup
1 tablespoon ground ginger
1 teaspoon cinnamon
1/2 teaspoon salt
1/2 teaspoon baking soda
Preheat oven to 250
Line 2 large baking dishes (I used 9 X 13 glass pans) with foil and coat with cooking spray. Fill each with 7 1/2 cups popcorn.
Combine butter, brown sugar, molasses, corn syrup, ginger, cinnamon, and salt in a large, heavy bottom saucepan. Heat over medium heat until mixture boils. Boil for 5 minutes; stirring frequently. Remove from heat and add baking soda. Pour over popcorn; toss to coat.
Bake at 250 for one hour, carefully stirring the warm mixture about every 15 minutes. Cool completely then store in an airtight container.
Vegan Spelt Banana Nut or Chocolate Muffins
What's a gal to do when there are too many nanners in the house to eat up? Duh.
These are so scrummy! I just love whole spelt flour...tastes so much better than whole wheat in my opinion. Finally, a banana bread recipe that is pretty darn healthy compared to most. I think it tastes way better than the butter laden ones to boot.
If you'd rather bake up a loaf, this fits nicely in an 4.5" x 8.5" loaf pan and would cook in about 42 minutes according to the original (pre-tweeking) recipe I found on Recipe Zaar.
Update: This has been my go-to banana bread recipe since the first time I made it. I know they're not vegan when made this way, but I now usually add 3/4 of a bar of Lindt "Touch of Sea Salt" chocolate; chopped, and about 1/3-1/2 cup nuts (if the Monster lets me get away with it).
This usually yields more like 9-10 muffins.
Vegan Spelt Banana Nut and/or Chocolate Muffins:
4 medium ripe bananas (I like to freeze the bananas in the peel, thaw them, pull off their bums and squirt out the innards, then whiz them up with a stick blender to smooth them out. You might have to heat them in the microwave after blending to warm them enough that your coconut oil doesn't seize up, if using)
1/3 cup pure maple syrup
3 Tbs grapeseed, canola, other healthful neutral flavored oil, or even hazelnut or walnut oil if you want to play up the nuttiness of the muffins (I've been using extra-virgin coconut oil lately...yum!)
1 tsp pure vanilla extract
1/2 tsp cinnamon
1 1/2 cups whole spelt flour
1 1/2 tsp baking soda
1/4 tsp fine sea salt
~3/4 cup walnuts or pecans (I've made this recipe so many times now and settled on using a combo of 8 squares chopped Lindt Touch of Sea Salt dark chocolate bar + a generous 1/3 cup walnuts)
Heat oven to 350.
Oil muffin tin (or loaf pan...cooking for ~42 min).
In a bowl, mash bananas then add maple syrup, oil, and vanilla.
In a separate bowl, sift together spelt flour, baking soda, salt and cinnamon.
Blend the wet and dry mixtures, then fold in nuts or chocolate chips.
Pour into oiled muffin tin and bake for about 23-25 minutes, or until tops just spring back upon applying gentle pressure and or a toothpick comes out cleanly.
Remove from oven and let cool in tin for about 5 minutes.
Remove from tin and place on a rack to finish cooling.
I do highly recommend at least one or 2 "sample" muffins eaten warm.
Tuesday, December 29, 2009
Wholemeal Buckwheat Bread
Here's my new favorite non-yeasted bread for a healthy New Year. I gave a dry mix of this to my mom for Christmas...jury is still out on weather or not she'll like it as much as I do. Some of the ingredients might be harder to come by for some, but I just love this toothsome stuff and find it well worth the trek to Whole Foods market to gather them. The first time I made the recipe from Susan Jane Murray's site, I used rolled oats in lieu of the rolled millet/barley. It resulted in a longer cooking time, but was still good. I like to cook this in a 9x13 pan and then cut into 8 planks when done. I pop them in the freezer and they're there for me whenever I want one. I've eaten them toasted with a fried egg on top or topped with some mashed avocado, lemon and sea salt (YUM), plain ol' buttered, and also toasted and broken up over my morning yogurt with fruit. All delish! Be forwarned, this opinion belongs to someone who happens to love buckwheat and is also into alternative "granola" type foods. :-) Susan Jane's site is an awesome new find for me. I hope to try out more of her recipes soon.
Jeez...typing this up has made me very sad not to have any tucked away in the freezer. Off I go to make some more!
Make sure you scroll all the way down for my alternate Banana-Almond version.
Wholemeal Buckwheat Bread:
(adapted from Susan Jane Murray)
1/2 cup buckwheat flour
1/2 cup soy flour
1 teaspoon Herbamare seasoning or celery salt (Herbamare is awesome stuff! My new fave and I've found it in several stores...no need to purchase online)
1 teaspoon cream of tartar
1/2 teaspoon baking soda
1 teaspoon ground ginger
1 teaspoon ground cinnamon (Vietnamese is best)
3/4 cup rolled barley (couldn't find the rolled millet the orig. recipe called for, and barley only from Whole Foods)
1/2 cup whole buckwheat grains (I toast 'em first in a dry skillet, stirring until a nice nutty fragrance develops...4-5 min?)
3/4 cup raw sunflower seeds
2 cups of milk or carrot juice (I use unsweetened vanilla almond milk)
2 tablespoons of honey or agave (I found a powdered cactus flower honey and use that now, since it's easier to mix in with the dry ingredients...totally random and you don't need to search it out to make this!) ;-)
1. Preheat oven to 360 degrees. Grease a 9x13 cake pan with a bit of oil, then line with parchment.
2. Sieve buckwheat flour, soy flour, baking soda, cream of tartar, seasoning and spices into a large bowl to introduce air and make it fluffy.
3. Add rolled barley, whole buckwheat grains, sunflower seeds and milk and sweetener. It should be of pouring consistency.
4. Bake for 30-40 minutes , or when a toothpick comes out clean.
5. Remove from oven, flip out onto a rack and allow cool. When cooled I use a pizza cutter wheel to zip through the bread to make 8 individual pieces, then slip them into a large freezer bag and store in the freezer. Better I think after it sits a bit...the buckwheat groats get a chance to soften up some.
To your good health in the New Year!!
I had 2 bananas to use up the other day, so thought I'd play around with the above recipe. Tastes great toasted and buttered!
Banana-Almond Wholemeal Buckwheat Bread:
1/2 cup buckwheat flour
1/2 cup soy flour
1 teaspoon Herbamare seasoning
1 teaspoon cream of tartar
1/2 teaspoon baking soda
1 teaspoon ground ginger
1 teaspoon ground cinnamon (Vietnamese is best)
3/4 cup rolled barley (could try a sturdy rolled oat too if you can't find barley)
1/2 cup whole buckwheat grains (I toast 'em first in a dry skillet, stirring until a nice nutty fragrance develops...4-5 min?)
~1/4 cup sliced almonds
2 medium sized over-ripe bananas, mashed
2 heaping Tbs. almond butter
1 1/2 cups of milk or carrot juice (I use unsweetened vanilla almond milk)
2 tablespoons of honey or agave
Preheat oven to 350 and line the bottom of a 9 x 13 cake pan with parchment paper and spray sides with a good canola spray.
Mix all dry ingredients together (buckwheat flour through sliced almonds)
In a separate bowl, combine mashed bananas with almond butter and honey and stir well.
Add almond milk to the banana mixture and stir until combined.
Stir wet ingredients into dry ingredient bowl.
Since I've only made this once, I can't remember how long I cooked it for.
Use a toothpick to check for doneness starting at around 30 min...knowing that it'll take longer than that. :-)
Friday, November 13, 2009
Dee-lish Tempeh Curry
I can't believe this is my first time cooking tempeh! I did a quick online search for tempeh recipes before heading to the market and up popped this lovely from Diet, Dessert, and Dogs. As it happens, Ricki of DD&D is also following an anti-candida diet plan, so her recipe was definitely the one for me. So good and so easy, this one will be made again soon.
I did add quite a bit more broth than she did, but you can just add as needed. In fact when I reheated the leftovers for lunch today I added half a bunch of organic chard and more broth still and mixed it with a bit of cooked quinoa. Even better than last night. Next time I'll make this with a full bunch of chard, or other green at the start.
Note that Ricki's recipe doesn't mention when to add the tempeh back in...I added it with the peas.
There also wasn't a salt amount given, but since I was using unsalted almond butter, I added ~1/2-3/4 tsp Kosher salt, along with a touch of cayenne for some heat.
I served this with a side of raita made with goat's milk yogurt, cucumber, and fresh mint.
Do try this recipe! Especially if you've never cooked tempeh before...super yum.
Tuesday, November 10, 2009
Broiled Rainbow Trout
I was thrilled to find that our fishmonger had just gotten these lovely whole dressed rainbow trout in on the morning I visited. I'd always wanted to just cook the whole fish...well, not quite the whole fish...I had her whack off the heads so they wouldn't be staring at us from our plates! I should have had her take the tails off too, but I'll know better next time. This couldn't be an easier preparation for some quickie protein. We've started eating more rainbow trout in lieu of tilapia these days for it's more healthful fat profile. Tilapia apparently has a whole lot of omega 6 fatty acids, and those really aren't very good for you. Not that I won't eat it anymore, just that I'll take the rainbow trout over tilapia if it works for my recipe.
Right as I was about to slice up some store bought lemon for the insides of the fishies, the Monster walked in the door with 3, count 'em 3!, beautiful meyer lemons grown by a very generous collegue!! Yippee yahooey! So away went the store bought lemon and one of the meyers went under the knife instead.
We ate the trout with roasted eggplant, steamed veggies topped with hummus and some whole wheat naan. Well, I ate eggplant & veggies/hummus...Monster just had the veggies with naan and hummus. ;-) SOOO hard to watch him eat that naan!!!
Broiled Rainbow Trout:
Whole dressed trout fillets
lemon juice
olive oil
Kosher salt
sweet smoked paprika
cayenne pepper; just a pinch
fresh or dried thyme
thin lemon slices
Pre-heat broiler on high with the rack ~4" away from the flame. I used the uppermost rack in my oven.
Brush insides of fish with olive oil, then squeeze lemon juice in each.
sprinkle salt, paprika, cayenne and thyme within the fish.
Finish each with 3 thin slices of lemon.
Place on lightly oiled foil lined baking sheet and broil for 4 minutes.
Flip the fish and broil for another 4 minutes and your fishies should be done.
Watch for bones when eating these puppies. Delish!
Roasted Eggplant
I've finally discovered that just because the Monster doesn't like eggplant, doesn't mean I can't just make it for myself. Specially since they come in all sorts of groovy shapes and sizes! When I first made this "recipe" I used paler purple, long skinny Japanese eggplants. This time I found a cute 6" tall globe eggplant and it cooked up just as nicely. I went a little longer in the oven since it was fatter than the others. Just watch your time depending on how big your eggplant is. The smaller ones tend to be less seedy, and therefore less prone to tasting bitter. Also, look for a smaller green cap and firm, shiny skin.
Roasted Eggplant with Thyme:
Eggplant (as many as you'd like to roast)
Kosher salt
olive oil
fresh thyme sprigs
fresh lemon juice to serve (optional)
Slice eggplant in half from it's top to it's bottom. Make deep crosshatching slashes almost to the skin. Salt each half with Kosher salt, getting it all the way down into the cuts.
Let eggplant sit, cut side up for 30 minutes.
~15 minutes into the salting process, pre-heat oven to 400.
Squeeze liquid from eggplant over the sink and wipe away the excess salt. I tend to rinse the eggplants so they're not too salty, but the original recipe didn't have you do that. Just make sure to really squeeze all the water/liquid from them well and dry with a paper towel.
Brush cuts sides with olive oil and place several sprigs of thyme on each before placing cut side down on a parchment paper lined baking sheet.
I tend to lightly oil the skins of the eggplant too.
Roast for 20-45+ minutes depending on the shape/size of your eggplant. I like them nice and soft but not mushy, but whatever floats your boat.
They're lovely with a little lemon squeezed over them.
Monday, November 9, 2009
Puree of Celery Root Soup
Yay! Something else I can eat! We had a loooong rainy Sunday at home and this was just the ticket for lunch paired with a simple salad. You may have passed by the lowly looking celery root (or celeriac) in the grocery store because 1) it's ugly as sin and 2) what the heck would you do with it anyway??
Well now you know...make this soup! :-)
I found a really big root, so I multiplied the recipe written below by 1.5 when I made it. Good thing too, as it wouldn't have made much otherwise. I'd go ahead and double the recipe next time using 2 lbs of celery root.
Orangette said to use a regular blender, not a food processor or stick blender, or the soup doesn't seem to emulsify properly.
Puree of Celery Root Soup:
(Adapted from the NYT, discovered on Orangette's lovely blog)
2 ½ Tbs olive oil, divided
1 small leek, white and very light green part only, coarsely chopped
½ medium yellow onion, coarsely chopped
1 stalk celery, coarsely chopped
2 cloves garlic, sliced
1 lb. peeled, chopped celery root (I only had to use 1 since that mother was 1.5 lbs!)
3 cups mild chicken or vegetable broth
½ tsp salt, plus more to taste
4-5 Tbs skim milk (I used unsweetened almond milk)
Chopped chervil, for serving (optional)
In a large saucepan over medium heat, warm 2 Tbs olive oil. Add the leek, onion, celery (but not the celery root like I did!), and garlic, and sauté until softened but not browned, stirring occasionally, about 5 minutes.
Add the celery root, broth, and salt, and bring to a boil. Reduce the heat to low, partially cover, and simmer until the celery root is very tender. It should break apart easily when poked with a fork; on my stove, this takes about 35-45 minutes. Remove the soup from the heat.
Using a blender and working in small batches – when working with hot liquids, never fill the blender more than 1/2 full and hold cover down with a kitchen towel - purée the soup until very smooth. Add the remaining ½ Tbs oil and the milk, and stir to incorporate. Taste, and adjust seasoning as necessary. Reheat gently until just steaming.
Makes 4 small servings as written
Wednesday, November 4, 2009
Heidi's Awesome Red Lentil Soup
This is really good. I can't eat the leftovers on this yeast-free program, so it's lying in wait for the Monster in the freezer. I have dreams about getting to devour a huge pot of this stuff, so thought I'd post my photo and a link to Heidi's recipe. I had to cook mine about twice as long as she did to get tender rice. Maybe because I used short-grain brown rice? Who knows...just don't be surprised if it takes longer than 30 minutes. I used organic veggie broth for the liquid and topped only with tamari roasted pepitas, crumbled feta, and a swirl of olive oil. Mmmmm.
Sunday, November 1, 2009
Fresh Tomato Sauce with Thyme
Ok, so maybe I'll post things afterall. Just because I can't have this rustic tomato sauce atop homemade goat cheese ravioli doesn't mean YOU can't. A good easy sauce to make for any pasta, or even steamed veggie, rice or hm...well, I'm sure you could figure out another use if none of those float your boat. The recipe comes from the sole issue of Vegetarian Times that I kept. Basically for this recipe and the pasta that went along with it. I ate it today on a bed of spaghetti squash and ground turkey breast along with a spinach salad for a very satisfying lunch today.
Fresh Tomato Sauce with Thyme:
(Vegetarian Times)
2 tsp olive oil
3/4 cup chopped onion (I probably used 1 cup)
3 cloves garlic, minced
~1/8+ red pepper flakes
5 seeded and chopped tomatoes (I used 7)
2 tsp fresh thyme
salt and pepper to taste
In a Dutch oven, heat olive oil over medium-high heat.
Saute onion for ~2 minutes.
Add garlic and red pepper flakes and cook 30 seconds, stirring.
Add tomatoes and thyme and when they come to a good simmer, turn heat to medium-low.
Simmer for ~25 minutes or until slightly thickened.
Add salt and pepper to taste.
Yeast-free....again.
Ugh. So after a short course of antibiotics I'm all out of whack again and am back on the yeast-free diet I did 3 years ago. This means no sugars of any, and I mean any kind, even including those in dairy, no grains, no fruits, nothing fermented (vinegars, soy sauce, etc.), no mushrooms, no legumes at the beginning, leaving me to eat what you ask??? Well answer is not too terribly much beyond tofu, lean meats, seafood, eggs, and non-starchy veggies. I can use lemon and lime juices on my salads etc. too. I'm eating avocados, almonds, pumpkin seeds and seed butters too, or I'd disappear into the ether.
Never thought I'd willingly spoon olive oil into my mouth straight in an attempt to keep weight on, but there it is.
No fun recipes to be had here any time soon. Bah humbug.
Never thought I'd willingly spoon olive oil into my mouth straight in an attempt to keep weight on, but there it is.
No fun recipes to be had here any time soon. Bah humbug.
Sunday, October 18, 2009
Stuffed Peppers with Black Beans and Quinoa
Mmmm...these were delish! I slapped 'em together in no time since I had some homemade tomatillo salsa in the fridge and some NYT black beans just waiting to be eaten too. Heck, I think the quinoa went in because I had some leftovers from a salad I'd made the night before too! All this to say work with what you have, this just happened to be a particularly pretty "fridge cleaner" dish. Or, you can always buy some salsa and canned black beans and make some quinoa especially for this...it's worthy.
Stuffed Peppers with Black Beans and Quinoa:
4 large peppers, gutted, and tops saved
About a 1/1 ratio of black beans to quinoa (if you're not using homemade black beans with lotsa onions and garlic in them you'll want to saute some before you proceed to adding the rest of the ingredients to the filling)
1 large ripe tomato, chopped
tomatillo salsa
a bit of cumin
a touch of coriander
chopped cilantro if you like
a bit of shredded sharp cheddar cheese
salt and pepper to taste
toasted pepitas to garnish
Pre-heat oven to 350.
Nuke peppers and their tops for 4 minutes.
Remove tops to a paper towel and keep nuking the pepper bodies for about 4 more minutes.
Remove peppers, drain and invert onto paper toweling.
Saute all but the cheese in a non-stick skillet, til some of the moisture has cooked away.
Mix in most of the cheese, fill peppers, top with the rest of the cheese and then replace tops.
Bake in a casserole that has about 1/4" of water or broth in the bottom for about 35 minutes or til hot clear through.
While the peppers are baking you can toast the raw pepitas (hulled punkin seeds) in a dry pan until they're nice and nutty.
Garnish with pepitas and serve with more tomatillo salsa at the table.
Saturday, October 17, 2009
Trick or Treat?
No recipes here...surely no one is loony enough to want to go to the trouble of making these! And, so I present a photo gallery of my latest stirrings in the lab.
First, gotta set that cauldron to berlin'.
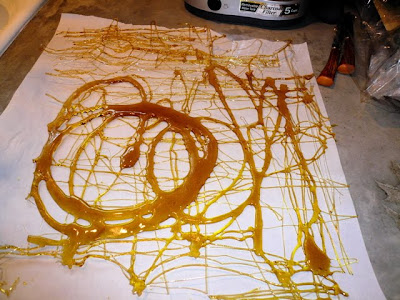
Wow, sugar gets really hot and hardens REALLY fast! First attempt. Maybe too hot?
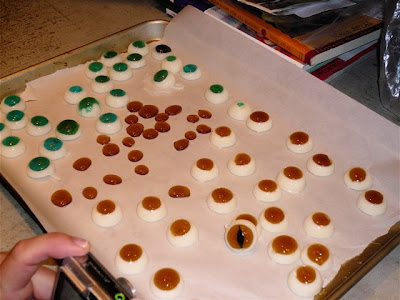
Ahh...much better luck this round. We might be getting the hang of this (only cause Debbie was pouring!). The yellow irises are all set in their silicone mold.
So what are we supposed to do with all this leftover sugar?? Hm...swirlies!
Ooooh pretty.
Alright, back to work! No wonder I'm blind and hunchbacked. Doing my best to trim off the extraneous bits and bobs.
Fabulous sclera layer! Who knew there was white opaque food coloring out there...
Almost there!
This is the tricksiest part of the whole recipe...just look at all the zucchini I've crammed into that cupcake batter. Ha!
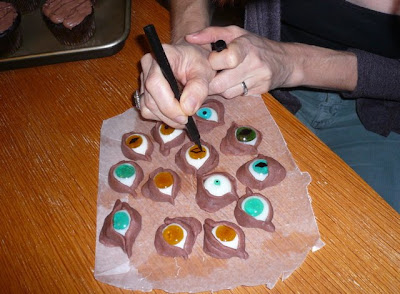
Time for the enpupilation! Guess I forgot to mention that I molded the eyelids out of cocoa tinted marzipan? Fun stuff.
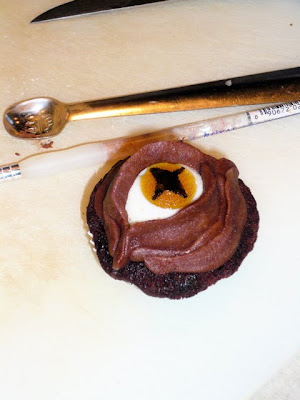
Shhhhh...don't tell those wretched kids that that's tofu frosting! Muahahahaha.
It's divine I must say. Do try it if you know what's good for you.
And to think I could have just made those darling little pumpkins on the marzipan box. As if!!
Not sure what kind of eye this is supposed to be. Monster said he wanted a dragon eye. I asked him what that was supposed to look like and he hadn't a clue. :-)
Whew...
First, gotta set that cauldron to berlin'.
Wow, sugar gets really hot and hardens REALLY fast! First attempt. Maybe too hot?
Ahh...much better luck this round. We might be getting the hang of this (only cause Debbie was pouring!). The yellow irises are all set in their silicone mold.
So what are we supposed to do with all this leftover sugar?? Hm...swirlies!
Ooooh pretty.
Alright, back to work! No wonder I'm blind and hunchbacked. Doing my best to trim off the extraneous bits and bobs.
Fabulous sclera layer! Who knew there was white opaque food coloring out there...
Almost there!
This is the tricksiest part of the whole recipe...just look at all the zucchini I've crammed into that cupcake batter. Ha!
Time for the enpupilation! Guess I forgot to mention that I molded the eyelids out of cocoa tinted marzipan? Fun stuff.
Shhhhh...don't tell those wretched kids that that's tofu frosting! Muahahahaha.
It's divine I must say. Do try it if you know what's good for you.
And to think I could have just made those darling little pumpkins on the marzipan box. As if!!
Not sure what kind of eye this is supposed to be. Monster said he wanted a dragon eye. I asked him what that was supposed to look like and he hadn't a clue. :-)
Whew...
Vegan Alfredo Sauce
This is a wonderfully flexible sauce and a must try even if you might be a bit skeptical. It comes from Vegan Yum Yum's Blog (link there if you're interested in a yummy looking vegan cookbook!) and we've had it twice now. The first time I made it with what I had on hand...regular soy sauce instead of the called for reduced sodium tamari. Waaaaay too salty, but still really tasty. We just used less sauce and it was just fine. This time I made it with the reduced sodium tamari and it was even better. Try this with noodles topped with steamed broccoli, or my favorite way...tossed with roasted veggies on a toasted whole wheat roll. Super yum! If you use it with noodles you might want to save some of the water you cooked the noods in. After you've added as much sauce as you want to the hot noodles, you can use some of the starchy water to loosen up the dish to your liking.
Judging from this recipe alone, I might just need a copy of VeganYumYum's new cookbook!
Hurry Up Alfredo by Vegan Yum Yum:
1/3 cup whole raw cashews
3 Tbs reduced sodium tamari sauce (I only used 2 last time I made it...might go with 2.5 next)
1/4 cup nutritional yeast flakes
2 Tbs Earth Balance margarine
1 Tbs tahini
1 Tbs fresh lemon juice
2 tsp dijon mustard
1/2 tsp Paprika (I used smoked paprika the first time and regular the second)
1 Pinch Nutmeg
1-2 cloves garlic
1 cup unsweetened almond milk, or milk of your choice
black pepper to taste
Since I don't have a super fancy Vitamix blender I add the cashews and the soy sauce and try to blend as smoothly as possible before adding the soymilk. It'll go all over the inside of the blender, but just push it back down with a spatula and add more of the other ingredients, adding the soymilk slowly until the nuts really get blended well. That's it! Just add all the stuff in and blend. How goofy easy is that?
Saturday, October 10, 2009
"Frog Spawn" Thai Tapioca Pudding
Bet you have no clue how insanely delicious frog spawn is, am I right? Take it from me, you'll want to slave over a hot stove for this one. I just happened upon this old photo from one of our parties in 2007 and it's popped me out of my non-blogging stupor just long enough to want to post this deliciously foul recipe. How could I not share, what with Halloween right around the corner? I'm not sure this is the serving suggestion Bon Appetit had envisioned when they published this in '06. But we've always called their "Thai Tapioca Pudding" Frog Spawn anyway...why not dress each cup accordingly.
"Frog Spawn" Thai Tapioca Pudding:
(Bon Appetit Jan '06)
1 2x1-inch piece fresh ginger, peeled, sliced
1 1x1-inch piece fresh galangal,* peeled, sliced
10 Thai basil leaves*
6 fresh cilantro sprigs
2 kaffir lime leaves* or 2 teaspoons grated lime peel
1 tablespoon sliced lemongrass*
2 cups water
2 cups whole milk (you could probably sub unsweetened soymilk)
1/2 cup sugar
1/2 cup small pearl tapioca* (not quick-cooking. I usually use Reese brand)
1 13.5- to 14-ounce can unsweetened coconut milk*
mini plastic frogs optional, but thoroughly recommended! :-)
another option would be to tint the "spawn" to a pale yellowish-green with food coloring...it's not been colored in my photo.
Combine first 6 ingredients in food processor; blend 20 seconds. Transfer to medium saucepan; add 2 cups water and bring to boil. Remove pan from heat and let steep uncovered 20 minutes. Pour mixture into strainer set over heavy large saucepan; press on solids to release flavored liquid. Discard solids in strainer.
Add milk and sugar to flavored liquid in pan; bring to boil. Stir in tapioca; return to boil. Reduce heat to medium and simmer uncovered until pudding thickens and is reduced to 2 1/4 cups, stirring frequently (you really should just pull up a chair and stir the whole durn time or it'll scald), about 35 minutes. Stir in coconut milk (pudding will be runny). Transfer to bowl. Cover and refrigerate overnight.
Tint with food coloring if desired and garnish each serving with a mini frog.
*Galangal, Thai basil, kaffir lime leaves, lemongrass, small pearl tapioca, and unsweetened coconut milk are available at Asian markets, or if you're in Austin or close to a Central Market they now seem to carry the kaffir lime and galangal as well as lemongrass, etc.
Saturday, September 5, 2009
Fresh Mango Bran Muffins
As promised, the lower fat mango version. These are still lovely and moist, like the ginger-pear recipe, with only 2 Tbs oil instead of 1/3 cup. You could always add a bit of candied ginger to this recipe too...experiment away!
I wish you could see the lovely mango bits in the photo...but since it was the last existing muffink and not getting eaten right away, didn't want to cut it in half. Don't let an uninspired photo dissuade you from making these though. :-)
I do want to mention again that I weighed the brans and the flour instead of using measuring cups. The amount of each by weight ended up being more than the listed cup measure.
Mango Bran Muffins:
(~215 cals per muffin, using 2 cups mango)
2 cups (3oz/86g) wheat bran
1 cup (5oz/141g) oat bran
1 cup (6oz/170g) whole wheat flour
2 teaspoons baking soda
1 teaspoon baking powder
1 teaspoon powdered ginger
1/2 teaspoon regular salt
2 large eggs
2/3 cup fat-free plain yogurt (I used fat-free Bulgarian...nice and sour)
1 1/3 cups low-fat buttermilk
2 Tbs canola oil
2/3 cup honey (I used about 1/6 mild flavored molasses, and the rest of the 2/3 total was honey)
2 teaspoons vanilla extract
1 1/2-2 cups diced fresh ripe mango (~1/4-1/2" dice)
Place oven rack in middle of oven and heat oven to 375 degrees. Grease a standard size muffin pan.
Combine wheat bran, oat bran, whole wheat flour, baking soda, baking powder, powdered ginger and salt in a large bowl and set aside.
Combine eggs, yogurt, buttermilk, canola oil, honey/molasses, and vanilla in a small bowl and mix well. Pour wet ingredients into dry ingredients and mix with a rubber spatula just until combined.
Gently stir in the diced mango.
Generously fill all 12 muffin cups with batter, using all the batter. Bake until a toothpick inserted in the center comes out clean, about 25 to 28 minutes. Cool muffins in pan for 15 minutes, then carefully remove from pan and serve warm, or let cool on a wire rack.
Friday, September 4, 2009
Ginger Pear Bran Muffins
Since we visited Alaska and ate at the Muffin Man in Anchorage I've seriously considered writing them a letter and begging for their mango bran muffin recipe. It was hands down the best muffin I've ever eaten in my life. I don't know how to describe it. It was a nice dense, but not heavy, and not overly sweet piece of goodness. Almost had a sourdough quality to it. I searched in vain for a recipe that might get me close to the same texture and qualities online.
This recipe was made out of desperation about a week ago...had to at least dampen the MM cravings to a dull roar. It's lighter in texture than the ones we had at the MM, but I can see definite possibilities in it. Think I'll be trying out changes by making half recipes. Might try adding buttermilk and cutting back on the oil a bit. Will surely use mango the next time, we just had a Costco flat of Bartlett's to use up. I really liked my addition of molasses to Farmgirl's original recipe...bumped up the ginger flavor by adding powdered ginger too.
I do want to mention that I weighed the brans and the flour instead of using measuring cups. The amount of each by weight ended up being more than the listed cup measure, just so's you know.
Best way to start this recipe is by shopping the bulk section of your favorite market for nice fresh ingredients. Will cost you less than 2 bucks for the brans, flour, gingers and most of the stuff I got was organic to boot.
The lower fat, just as delish mango version will follow tomorrow!
Ginger Pear Bran Muffins:
(Adapted from Farmgirl Fare)
2 cups (3oz/86g) wheat bran
1 cup (5oz/141g) oat bran
1 cup (6oz/170g) whole wheat flour
2 teaspoons (12g) baking soda
1 teaspoon (6g) baking powder
1 teaspoon powdered ginger
1/2 teaspoon (4g) salt
2 large eggs
2/3 cup (5-1/2oz/156g) plain yogurt (I used fat-free Bulgarian...nice and sour)
1/3 cup (2-1/4oz/65g) canola oil
2/3 cup (7-1/2 oz/216g) honey (I used 1/3 light flavored molasses, 1/3 honey)
1 teaspoon (6g) vanilla extract
2 cups peeled & mostly mashed ripe (Bartlett) pears (about 3 pears or 17 oz) or 2 15-oz cans of pears, drained and mashed + 1/3 cup of the pear syrup
1/2 cup finely chopped candied ginger (I think I only used about 1/3 this time...also maybe sub cranberries)
Place oven rack in middle of oven and heat oven to 375 degrees. Grease a standard size muffin pan.
Combine wheat bran, oat bran, whole wheat flour, baking soda, baking powder, powdered ginger and salt in a large bowl and set aside.
Combine eggs, yogurt, canola oil, honey/molasses, and vanilla in a small bowl and mix well. Pour wet ingredients into dry ingredients and mix with a rubber spatula just until combined.
Gently stir in the pears and candied ginger.
Generously fill all 12 muffin cups with batter, using all the batter. Bake until a toothpick inserted in the center comes out clean, about 25 to 28 minutes (I went about 28). Cool muffins in pan for 15 minutes, then carefully remove from pan and serve warm, or let cool on a wire rack.
(I figured these at ~265 cals per muffin)
My favorite way to eat these is crumbled up in a bowl of plain fat-free yogurt, sometimes tossing a few walnut pieces in too. YUM!
Saturday, August 22, 2009
Fresh Fig and Tomme Quesadillas with Honey-Balsamic Reduction
You don't really need much of a recipe for this one. We didn't have any plans for dinner when we hit Central Market this afternoon, but we happened upon some nice ripe mission figs on sale. I decided then and there to make some quesadillas with them, so we bagged some up and headed off to the cheese department. After tasting several, we went with a sheep and goat blend Tomme. We used the multigrain CM tortillas and topped our quesadillas with a quick honey-balsamic reduction. A simple salad of arugula, spinach and toasted sliced almonds finished everything off.
Oh I must mention that I got curious about goat's milk yogurt at the store, bought some and ended up eating it for dessert....WITH some leftover honey-balsamic sauce and the last of the toasted almonds. Divine!
Fresh Fig and Tomme Quesadillas with Honey-Balsamic Reduction: (serves 2)
4 fresh ripe mission figs, quartered
2- 9 inch tortillas
1/4 lb Tomme (or Etorki), grated
fresh ground black pepper
~1/4 cup balsamic vinegar
~1+ Tbs honey (an orange blossom honey would be nice)
Cook the balsamic vinegar and honey over medium heat in a small saucepan, until reduced by half. Cover and leave in saucepan until ready to drizzle. (Reheat slightly if too thick by the time you go to drizzle on quesadillas)
Lay down a quarter of the grated cheese on one half of the first tortilla.
Place half of the figs on cheese.
Top with another quarter of cheese and a grind of black pepper.
Fold the tortilla in half and repeat with the second tortilla.
Heat a large non-stick skillet over medium heat.
Place both tortillas in skillet and heat until cheese melts and tortilla browns lightly.
Flip and heat other side until done.
Remove to plates, cut each in thirds and drizzle with sauce.
Thursday, August 6, 2009
Polenta with Tomato-Braised Beans
This is a fairly quick supper to make on a weeknight, especially if you cook the polenta on the stove-top as the original recipe calls for, but now I always use Alton Brown's oven cook method. ~40 minutes covered in the oven, stirring every 10 to keep it lump-free. No muss, very little fuss.
This will be a good one if it ever cools down again.
Polenta with Tomato-Braised Beans:
(adapted from Cooking Light and Alton Brown)
Polenta:
2 tablespoons olive oil, plus extra for grilling or sauteing if desired
3/4 cup finely chopped red/white onion
2 cloves garlic, finely minced
1 quart chicken stock or broth
1 cup coarse ground cornmeal (I use Bob's Red Mill's medium grind whole cornmeal)
1 scant teaspoon kosher salt
1/4 teaspoon freshly ground black pepper
2 ounces Parmesan, grated (I use less, probably only 1/2-1 oz)
Preheat oven to 350 degrees F.
In an oven-safe saucepan (I use a 2.5 qt) heat the olive oil over medium heat. Add the red onion and a pinch of salt and sweat until the onions begin to turn translucent, approximately 4 to 5 minutes. Reduce the heat to low, add the garlic, and saute for 1 to 2 minutes, making sure the garlic does not burn.
Turn the heat up to high, add the chicken stock, bring to a boil. Gradually add the cornmeal while continually whisking. Once you have added all of the cornmeal, cover the pot and place it in the oven. Cook for 35 to 40 minutes, stirring every 10 minutes to prevent lumps. Once the mixture is creamy, remove from the oven and add the salt, and pepper (the original recipe calls for adding unsalted butter at this stage, which I don't do...maybe add 1 Tb if you want). Once they are incorporated, gradually add the Parmesan.
Beans:
2 tablespoons extra-virgin olive oil
1 tablespoon finely chopped fresh flat-leaf parsley
2 garlic cloves, minced
1 teaspoon chopped fresh sage
1 (14.5-ounce) can diced tomatoes, undrained
1/4 teaspoon freshly ground black pepper
1 (19-ounce) can cannellini beans, rinsed and drained
While your polenta is baking, heat olive oil in a large saucepan over medium-high heat. Add parsley and garlic to pan; sauté 1 minute. Add sage and tomatoes; cook 12 minutes or until liquid almost evaporates. Add black pepper, and beans to pan. Cover, reduce heat, and cook 10 minutes, stirring occasionally.
Serve polenta with bean mixture.
Thursday, July 2, 2009
Coconut Crab and Shrimp Salad
A wonderful light summer lunch or dinner. Serve with toasted pita triangles if you like. (Lightly spritz both sides with cooking spray, sprinkle evenly with a combo of sea salt, ground cumin, garlic powder...maybe a touch of cayenne, and bake for about 5 min at 450 or until lightly browned). We skipped them tonight, cause you know...the whole turning on the oven thing. Not gonna happen.
Coconut Crab and Shrimp Salad:
(Cooking Light)
Cooking spray
1/2 pound medium shrimp, peeled and deveined (I just bought cooked shrimp at the fish counter and saved some work...who wants to turn on the stove when it's 105 out??)
1/2 teaspoon salt, divided
1 cup fresh or frozen corn kernels, thawed (about 2 ears)
1/3 cup finely chopped red onion
1/3 cup chopped fresh cilantro
1/3 cup diced peeled avocado
1/2 pound lump crab meat, drained and shell pieces removed
1 jalapeño pepper, seeded and chopped
3+ tablespoons fresh lemon juice
2 teaspoons extra-virgin olive oil
6 cups torn Boston bibb lettuce (I usually just keep the leaves whole, like flower petals with seafood mounded in the center )
1/4 cup flaked sweetened coconut, toasted
Heat a medium nonstick skillet over medium-high heat. Coat pan with cooking spray. Add shrimp and 1/4 teaspoon salt; cook 4 minutes or until shrimp are done, turning once. Remove from the pan. Coarsely chop shrimp. Or just skip to the chopping part if you've bought the pre-cooked shrimpies. :-)
Combine corn and the next 5 ingredients (through jalapeño) in a medium bowl. Gently stir in the shrimp. Combine juice, oil, and remaining 1/4 teaspoon salt, stirring with a whisk. Drizzle juice mixture over shrimp mixture; toss gently to coat. Divide lettuce among each of 4 plates (I drizzle lemon juice over the leaves after arranging them on the plate); top with shrimp mixture. Sprinkle evenly with toasted coconut.
Yield: 4 servings (serving size: 1 1/2 cups lettuce, about 1 cup salad, and 1 tablespoon coconut)
CALORIES 223 (34% from fat); FAT 8.5g (sat 2.2g,mono 3.6g,poly 1.3g); IRON 3mg; CHOLESTEROL 124mg; CALCIUM 94mg; CARBOHYDRATE 16g; SODIUM 613mg; PROTEIN 24g; FIBER 3g
Tuesday, June 30, 2009
Corn Pud-ttata Fantastico
This recipe was paired with the Earth Magic Heat Sauce from a recent post on FOODChair's blog.
A wonderful hybrid of a corn pudding and frittata. The only change I made was due to shear laziness...frying strips of poblano with the onion instead of roasting them separately. I think you could get away with putting a whole can of beans in this (pretty sure the pie pan would have held the rest of the can) if you don't want any leftover bean stragglers in your fridge. We'll be eating this again!
Corn Pud-ttata Fantastico:
(adapted from Callipygia's recipe @ FOODChair)
Ingredients:
1 onion sliced and fried
1 C of rice milk (I used unsweetened soymilk)
1 C of corn kernels
4 eggs
½ tsp of salt
½ tsp of ground cumin
4 Tbsp of amaranth flour (I used brown rice flour)
2 roasted poblano peppers, stemmed and seeded
½ C chopped cilantro
¾ c pinto beans
1/3-1/2 C feta cheese crumbled
Topping: Earth Magic Heat sauce, and Greek yogurt
Preheat oven to 350.
Place milk, corn, eggs, salt, cumin, and amaranth (brown rice) flour in a blender and whirl until the corn is properly pulverized.
Grease a 9" pie plate and place fried onions, poblano pepper strips, cilantro, beans, and feta into the bottom.
Pour the corn filling over and bake until golden and set, about 40 minutes. Let rest a bit (at least 15-20 min.)and slice.
Serve topped with Earth Magic Heat Sauce and a dollop of Greek yogurt.
Earth Magic Heat Sauce
Wow...this is really good. Easy to make and comes from the ever inspiring FOODChair's blog.
I'm not sure I've ever worked with large dried peppers before. I remember having them in the pantry years ago, but for what purpose I've no idea.
I freaked out at how seemingly hot the sauce was when making it, even though the peppers were stemmed and seeded before soaking they still packed quite a punch. Consequently, I added more sugar in hopes that it might calm the heat a bit. An overreaction. It didn't need more sweet as the heat seemed to calm down a bit as it sat. Because I'd made it too sweet, and since adding vinegar helps with heat, I added a touch of white vinegar too. Should have just made it as is and fussed with it only if really necessary at the end, but I don't always find myself as patient and trusting as a situation warrants. All this said and it was still wonderful!
I also made her sweetly named Corn Pud-ttata Fantastico, a recipe she paired with the sauce in the same entry. Wonderful combo that I'll make again and again.
A good bit of the leftover sauce is going into the freezer for anytime goodness.
Earth Magic Heat Sauce:
(Callipygia @ FOODChair)
5 Dried Pasilla Chili, seeded and stemmed (just cut down the length like a vanilla pod to seed)
3 Dried Guajillo Chili, seeded and stemmed
1 small onion, chopped
3 garlic cloves, sliced
1 Tbsp. of brown sugar
½ tsp of salt (to taste)
½ tsp of allspice
½ tsp of oregano
soaking water
"Directions: Place chilies in bowl and soak in hot water until supple (~10 min). Meanwhile fry up your onions and garlic until there is a little color. Place the softened chilies and the remaining ingredient in a blender and whirl with some of the reserved soaking water until sauce is thinned to your preference. Taste and tweak. Then fire up the pan once again, adding a little oil and then "fry" up the sauce for a few more minutes to allow the flavors to deepen."
Thursday, June 25, 2009
Tilapia with Mango Salsa
This is a nice fresh, no-brainer of a salsa that I posted ages ago (my 2nd post!) served with baked salmon . Would no doubt be wonderful on chicken as well. When it's so dagblam hot out (105!) nobody wants the oven on for long, so the broiler is my friend. Dirtying a grill pan just seemed like too much trouble, so I broiled the zukes too. And, we had a roasted sweet tater in the fridge that I turned into more of the insanely good chipotle mashed sweet potatoes.
Tilapia with Mango Salsa:
(Salsa from Cooking Light)
~10oz. or 3 small ripe mangoes, diced
1/4 cup diced red onion
1/4 cup chopped cilantro
~1+ Tbs lime juice
1 serrano pepper (I used a jalapeno this time) seeded, and minced
1 clove garlic, minced
~1 Tbs olive oil
salt and pepper to taste
~1 lb.Tilapia fillets
salt and pepper
olive oil
cumin, coriander, and garlic powder
Combine all ingredients for the salsa (mangoes thru s & p), taste, tweak, and set aside.
Heat broiler on high.
Lay fish on a foil-lined sheet pan.
Lightly oil each side of the fillets with olive oil.
Salt and pepper the fillets, then add a pinch of cumin, coriander and garlic powder over each as well (if you want).
Broil fishies for about 4-5 minutes, then flip and continue cooking until done. Usually just a couple minutes more.
Serve each fillet topped with mango salsa.
Wednesday, June 24, 2009
Sesame-Orange Dressing (Chicken Salad)
This salad was the result of having leftover rotisserie chicken on hand. I'll print the directions (which I've never tried) for making the salad starting with raw chickies though. Just know that this can come together in no time if you've got some cooked chicken on hand. For the life of me I can't remember what blog I got the "adapted" recipe from, but the dressing was originally from Cooking Light magazine. You could use the dressing in all sorts of vegetarian applications too... nice just used on a slaw mix or even a stir fry if you add some cornstarch.
Sesame-Orange Salad Dressing:
(Recipe adapted from Cooking Light, June 2009)
This recipe is Low Fat, Vegan, Dairy-Free, Egg-Free, Nut-Free, Soy Protein-Free and optionally Gluten-Free
2/3 cup orange juice (fresh squeezed is best – about 3 small Navels)
2 Tbs rice vinegar (I did add a bit more of this than called for)
4 tsp soy sauce or wheat-free tamari (for gluten-free)
1 Tbs sesame oil (the good, dark kind if you have it)
2 tsp packed brown sugar
1(+) tsp hot chili sauce (such as Sriracha)
2 Tbs flax meal / ground flax seeds
1 to 2 green onions, minced (optional)
lightly toasted sesame seeds (I used Gomasio seaweed blend so I didn't have to fuss with toasting [read, burning] the seeds)
Whisk everything but the sesame seeds together and allow the dressing to sit for ten to fifteen minutes while you make the rest of your salad. After dousing your salads in this yummy dressing, sprinkle each salad with 1/2 teaspoon of the sesame seeds.
What I read on a blog...
"To prepare a large Asian-Style Orange-Sesame Chicken Salad, I coated 12 ounces of chicken (8 to 10 would be ideal for two people) with 1 Tablespoon cornstarch, 1 Tablespoon sherry, 3/8 teaspoon salt, and 1/4 teaspoon pepper. I then sauteed the meat over medium-high heat in about 2 teaspoons of refined sesame oil. To prepare two salads, I chopped up one large romaine heart, topped the lettuce base with store-bought coleslaw cabbage mix for some crunch, sprinkled on a thinly sliced carrot, followed by the cooked chicken, the dressing, and finally the sesame seeds."
What I did...
Using shredding blade of food processor, shred some carrots and red cabbage. Toss with some of the dressing and set aside.
Dice leftover rotisserie chicken.
If you have one like I did, dice a nice ripe Bartlett pear.
Arrange chopped Romaine lettuce on each plate, toss with some of the dressing.
Add chicken and diced pear to the dressing that's left over and toss to coat.
Place some of the slaw in the center of the Romaine on each plate.
Now top that with your chicken and pear mixture.
Sprinkle the whole salad with either toasted sesame seeds or Gomasio.
Thursday, June 18, 2009
Honeyed Lentils
This was one of our hostess' food offerings the other night at book club and it was really delicious. Had I known how simple it was to make it would have gone on the menu for the next night. The only dish you dirty is the glass loaf pan. Gotta love that. Thanks for passing on this stellar recipe Monica!
Honeyed Lentils:
(ever so slightly adapted from Monica Mueller)
Monica always doubles this recipe and has two loaf pans going at once. I'd think these would freeze nicely, so makes sense to me.
1 c green lentils, sorted and rinsed
2 c water
2 T honey (I know it's called Honeyed Lentils, but I'll use a lot less than 2 Tbs next time :-)
2 T tamari or liquid amino acids
2 T olive oil
1/2 t ginger powder
1 clove garlic, minced
1 small onion, chopped
Pepper
I added fresh lemon juice at the end of baking because it was a little sweet for my taste. Next time I might only use 1/2-1 Tbs honey, and still use the lemon too.
Preheat oven to 350.
Mix all ingredients and bake, covered, for 1 1/2 hours. (Monica noted that she usually uses glass bread loaf pans covered in tin foil, so I did the same.)
Serve by itself or over rice.
I'd wanted to post about the cabbage because it's REALLY good! But, cut into the onion required to make it and not so pretty a scene. Made it without, but this is the link to the original recipe on Simply Recipes blog anyway. I just make it with red cabbage instead. Follow the instructions for the sauteed version.
Wednesday, June 17, 2009
Presto Chango Mexican Chicken Soup
Don't feel like just your run o' the mill chickie soup that you've got in the freezer for dinner tonight? Got a few extra things to get rid of in your pantry and fridge? Poof! Ya got Mexican Chicken Soup.
I had half a batch of Ina Garden's Chicken Soup (that I made with leftover brown rice instead of noodles) in our freezer, a can of Mexican diced tomatoes, a zucchini that I shredded, and the tail end of a bag of frozen corn (probably ~1/2 cup)...
tossed it all together and simmered for a bit, then served topped with crumbled baked tortilla chips and a bit of shredded cheddar. Nice for a presto chango dinner. :-)
Sunday, June 14, 2009
Greek Turkey Burgers
Dinner tonight...nice and moist for turkey burgers too. I figured I'd try sealing some feta inside the burger rather than crumbling and mixing it all through the meat to keep it from oozing all over the place and burning. Worked great!
Greek Turkey Burgers:
1 lb 93% lean ground turkey (the pre-packaged turkey I bought only came in 1.2 lb size, so if you're in the same boat don't worry about increasing the other ingredients)
1/3 cup whole wheat bread crumbs (or reg.)
2 egg whites
~3/4-1 cup chopped baby spinach
~1/3 cup diced red onion
~1/2 tsp dried Greek oregano
zest of 1 lemon, ~1 tsp
~1 Tbs chopped Italian parsley
~1/2 tsp garlic powder
~1/2 tsp kosher salt
1/2 tsp fresh ground black pepper
olive oil to cook burgers
4 feta cheese slices
whole wheat buns
Optional toppings:
mayonnaise (I use Spectrum brand vegan mayo)
lettuce
tomato
avocado
Mix turkey through black pepper using the paws that Dog gave ya.
Divide mixture into 4ths, then each 4th in half.
Make 8- ~1/4" thick patties.
Place a slice of feta on 4 of the patties.
Top each of those with another patty sealing the edges around the cheese.
Heat some olive oil in a non-stick skillet that you have a lid for over medium-high heat.
Sear burgers for 3 minutes on each side, then cover and reduce heat to medium, cooking for another 8 minutes, for a total of ~14 minutes.
Subscribe to:
Posts (Atom)